So, when I had to come up with a project for my demonstrator Christmas swap (I tell ya, being a demo is SO much fun--you should really consider it), I thought I would stretch myself to try something new. We need to keep our costs to $5 or less. I was thinking of sewing something, so I grabbed my Jo-Ann coupon and found three pieces of fabric that worked well together for the "feeling" I was going for. I already had the notions, so my total cost was $5.42. I went over, but I also have enough fabric to make 4 more of these pillows, so I think I'm OK.
Here is the fabric:
 |
| Simple ticking in navy, some burlap and muslin. |
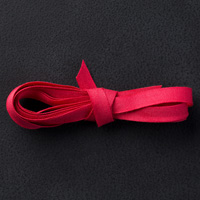
Next, I stamped the brackets (also included in this set) in Soft Suede. The buttons are from the Nordic set, and I sewed them on with the burlap strings that came off the ends of the fabric. The bow in the corner is made with the Real Red cotton ribbon from the Holiday Catalog which I overlapped with the Venetian Crochet Trim.
I then sewed the pillow base and then overstitched this piece on the top before closing up and stuffing it. Seriously, the whole project took me about an hour from start to finish, and that was with the learning curve.
The best part? It's "organic" or "rustic" or whatever you want to call "forgiving." If there's a mistake, that's OK. It's homemade, right?
I hope whoever gets it doesn't scrutinize too much.
If you're interested in replicating this project yourself, here are the Stampin' Up! supplies you'll need:
Thanks for looking. I hope you liked the project and learned something. Feel free to let me know either way.
Until next time, stay crafty!
Alison


No comments:
Post a Comment