We all got a text telling us that our birthday girl's dog had escaped in the 20 below zero temperatures and she, her neighbors, and as many volunteers as possible were out braving the cold to find darling Lucy.
We couldn't all up and leave since we had just ordered, but two of our group took off to see what they could do. I didn't have a car (having been dropped off by my hubby), so the rest of us decided to sit tight, hope for the best and wait for updates.
As we sat there, I realized my hand-made card should not make an appearance this evening. I had designed it for happy days, not this. I pulled it out of my purse, passed it around, and everyone agreed.
I'll explain how I made the card later (because I know you're all more interested in the dog than in my card). About two hours later, Lucy was found! She had followed one of the girls out the front door (without her knowing), then saw a man walking his dog, and followed him home. The man called the shelter, and a happy reunion was made.
Thank goodness.
The birthday girl texted, said she was hungry and was on her way. What a turn of events. We all celebrated with wine and warm food. We told furry-friend stories and had a lovely evening after all.
As it happened, the card I made turned out to be most apropos. We only know how great our joys by the depths of our sorrows. And we were all very joyful.
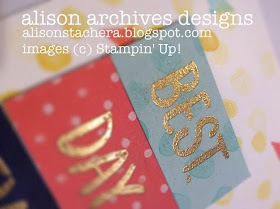
I "CASE'd" this card from the Sale-a-Bration Catalog cover. See that card on the bottom in the middle? I used that as my design springboard.
I modified it, of course. I used the stamps in the Best Day Ever set as a background. This stamp set is not for sale. You can only get it as a FREE item when you purchase $50 in Stampin' Up! merchandise between now and March 31st. Click HERE to see more Sale-a-Bration items.
The base for each word is 2" by 1". Then I stamped each word in Versamark, sprinkled Gold embossing powder and used my heat tool to set it.
That's all there was to it. It's easy and cute. But it deserved a nice envelope. I took a piece of the Birthday Bash DSP and cut it to 8 inches by 8 inches and then used my Envelope Punch Board to make a custom envelope.
And waddya know? The Envelope Punch Board is on sale this week as a weekly deal (but only until Monday at midnight Mountain time!)
Here's the envelope I made:
I know the photo quality is poor. I snapped it as I was walking out the door (oooh, I made a rhyme!).
The star holds the top flap down. Oh, and the orientation of the envelope matches the card. You can't do that with a standard envelope, but you sure can when you make your own!
It was an emotional evening, but there was a happy ending, and in real life, we can't take that for granted (maybe a little Disney magic followed me home!).
Thanks for stopping by today. Please check out the links below for deals, special offers or unique projects.
Until next time, stay crafty!
Alison


No comments:
Post a Comment